Xubuntu is the Ubuntu flavor with Xfce. Xfce is a lightweight desktop, fast, stable, simple and user friendly. Xubuntu is Free and Open Source. It is an excellent choice for any desktop computer, even more for those with older hardware or lower specifications. A nice environment with great support for sound, peripherals, removable devices and any kind of networking (wired, wi-fi etc) “out of the box”. Moreover, a lot of free (usually Open Source) applications are available to create your working environment. Version 16.04 LTS provides software updates for 3 years (LTS = Long Term Support). In short, it contains everything you need in a modern desktop.
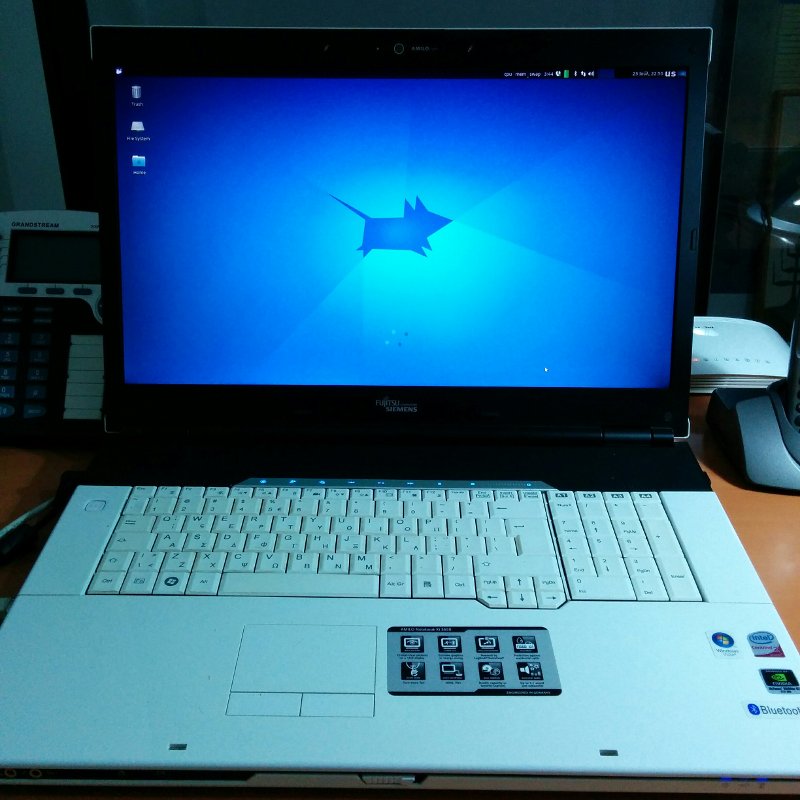
Xubuntu installation performed on a 7 years old Fujitsu Siemens AMILO Notebook Xi 3650:
- CPU: Intel Centrino 2 processor technology with Intel Core 2 Duo processor P8400
- RAM: 4096MB DDR3 Memory
- Hard disk space: 2 x 300GB SATA 5400 rpm hard drives
- Graphics card: Dedicated NVIDIA GeForce 9600M GT with 512MB video memory & Intel Graphics Media Accelerator 4500M HD featuring NVIDIA HybridPower technology
Software installation in Xubuntu (or any *ubuntu) can be performed using command line
sudo apt-get install package_name
or using graphic utilities (“Synaptic” or “Software center”). See details in this post. In this tutorial I use the first method.
My goal is to create a Simple And Functional Linux Desktop.
Xubuntu setup is similar to Ubuntu setup. So, I don’t duplicate these sections, but I put a link to post How To Setup a Workstation Computer With Ubuntu Desktop 16.04 LTS Step by Step instead.
REMARKS
- you will not find information on setup server applications like apache, php, mysql etc in this article. If you are interested on this software, please see this post.
- in this article I also describe the software I use for software development. If you are not interested on this kind of software, please skip relevant sections.
Basic setup
Xubuntu desktop setup is a simple graphical procedure. Download Xubuntu desktop here. Insert the CD (or the USB) and follow the instructions. Setup will only ask for your name and password and disk partitioning. Everything else is a graphical “wizard”.
Main system user
Username and password you provide during default setup will be used to create the main user of your system. This user will be automatically added to sudoers group (users with “administration privileges”).
By default, the root account password is locked in
Xubuntu (or any *ubuntu). So, to execute admin tasks you have to
use sudo. For example:
sudo apt-get install package_name
Disk Partitions
You may let Xubuntu to decide for your disk(s) partitioning or to define it manually, as in my case.
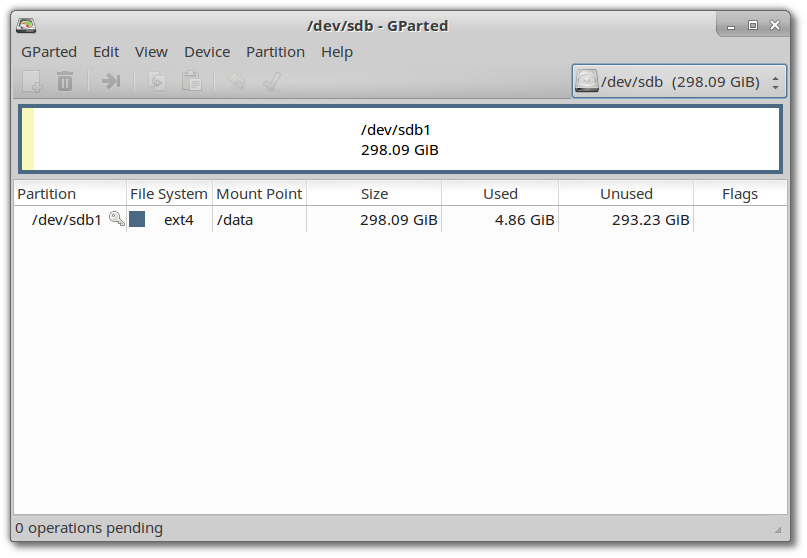
I use ext4 file system for system and data partitions.
This computer has two 300 GB hard disks, so I used the following structure.
First hard disk for the Operating System

The first partition I defined is the /boot partition (mount point /boot) and the second is the root partition (mount point /). It is strongly recommended to define a swap partition. As a rule of thumb set the double size of your computer RAM. It is recommended (but not required) to have a separate boot partition. tmp partition is optional (more useful for public server systems).
Second hard disk for data storage
After completing the Basic setup
When setup finishes, you have a working system, covering all of your basic needs.
Next steps include:
- Update System
- Tweak Command Line Environment
- Install more Command Line applications
- Programming Languages
- Tweak Desktop Graphical Environment
- Install more Graphical applications
- Install Web Development software
- Setup peripherals
- Cloud integration
- Recovery mode
- Backup your workstation
Update System
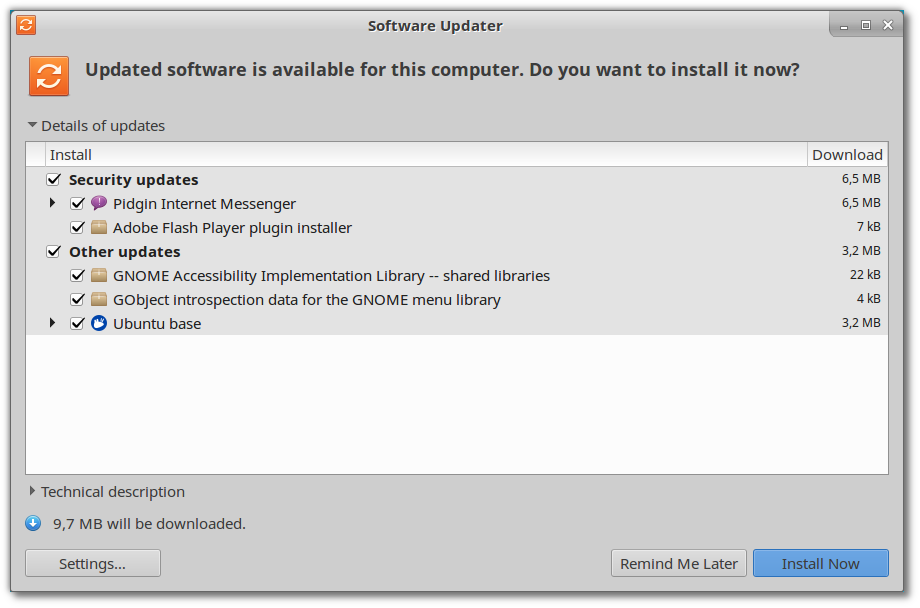
The first thing you have to do after Basic setup is to update your system.
Launch “Menu → Settings → Software updater” (recommended)
or open a terminal and type
sudo apt-get update && sudo apt-get -V upgrade
Tweak Command Line Environment
This section is optional.
Base system includes a lot of command line tools (GNU or other). To run these programs, first launch a Terminal.
“Menu → Accessories → Terminal Emulator”
or using keyboard shortcut: SUPER+T
To color bash prompt
sudo nano ~/.bashrc
uncomment #force_color_prompt=yes.
Increase Terminal fonts
Edit → Preferences → Appearance
Furthermore, see relevant section in Ubuntu setup.
Install more Command Line applications
This section is optional.
See relevant section in Ubuntu setup.
Programming Languages
This section is optional.
See relevant section in Ubuntu setup.
Tweak Desktop Graphical Environment
Xubuntu uses Xfce as Graphical Desktop Environment (hence the name). Xfce is a lightweight desktop, elegant and simple.
Xfce panel is located at the top of the desktop. Xfce panel can be easily customized adding new items, using “right click”. The main component of the panel is Application launcher (“main menu”).
Xubuntu comes with many applications very useful for everyday work. Core Xfce components and applications are available from the top Menu (Application Launcher). They are divided into several categories (Favorites, Office, Accessories, Graphics, Settings etc). “Favorites” is the area with the most used applications. You can easily add an application to “Favorites” just using “right click”.
-
Menu → Accessories → File Manager
-
Menu → Accessories → Terminal Emulator
-
Menu → Accessories → Mousepad
-
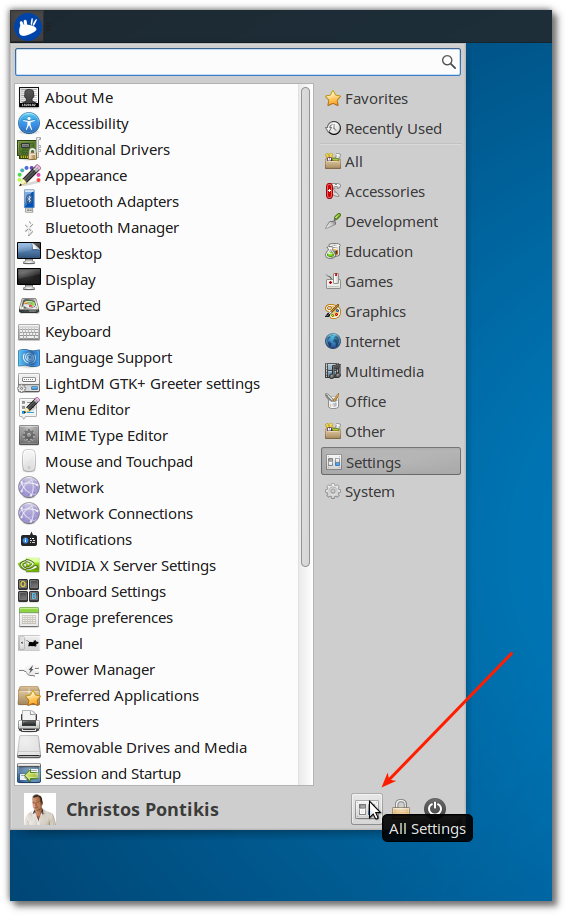
Menu → Settings
(or use the All Settings button in Application Launcher)
-
Menu → Office → LibreOffice Writer
Menu → Office → LibreOffice Calc
-
Menu → Internet → Firefox Web Browser
You can Logout, Restart or Shutdown computer from the Log Out button in Application Launcher).
Customize Xfce in Xubuntu
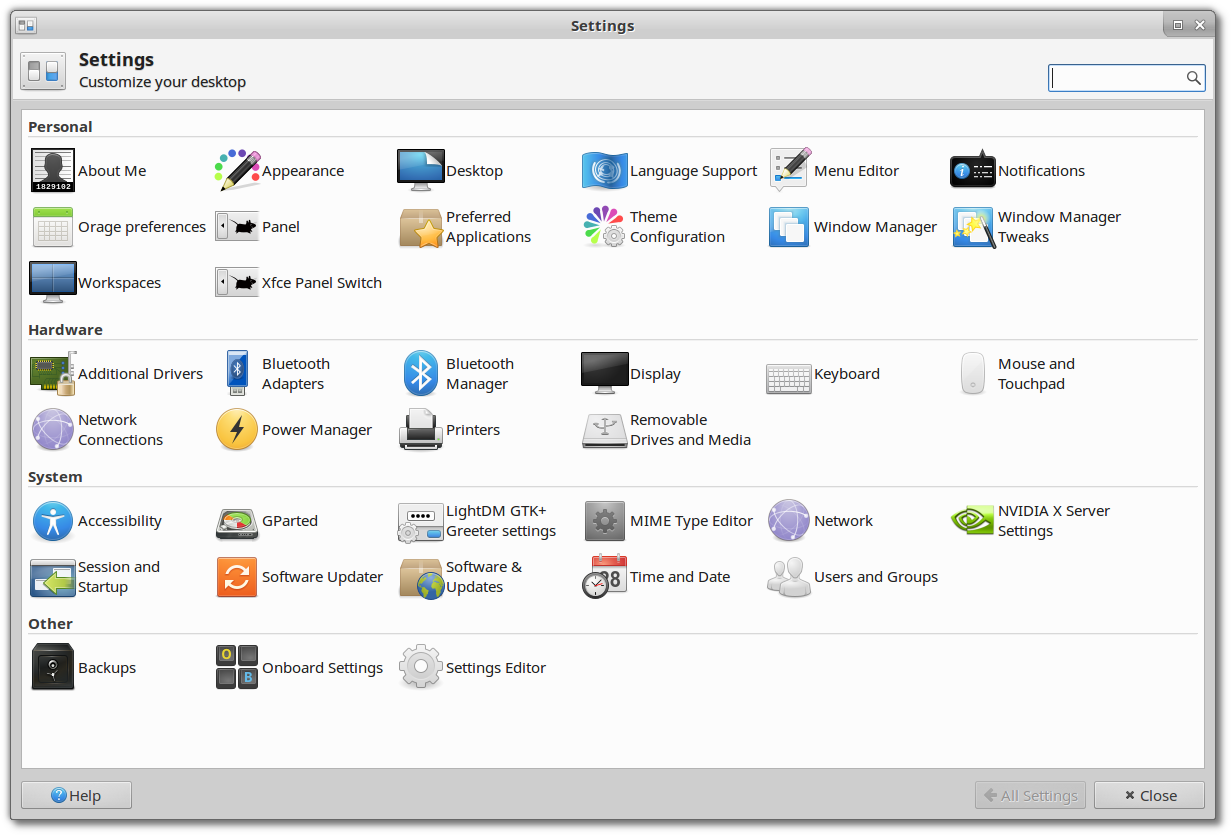
Xubuntu settings are available from the Menu. Press “Settings” or use the “All Settings” button in Application Launcher:
There are a lot of settings you can modify to tweak your system:
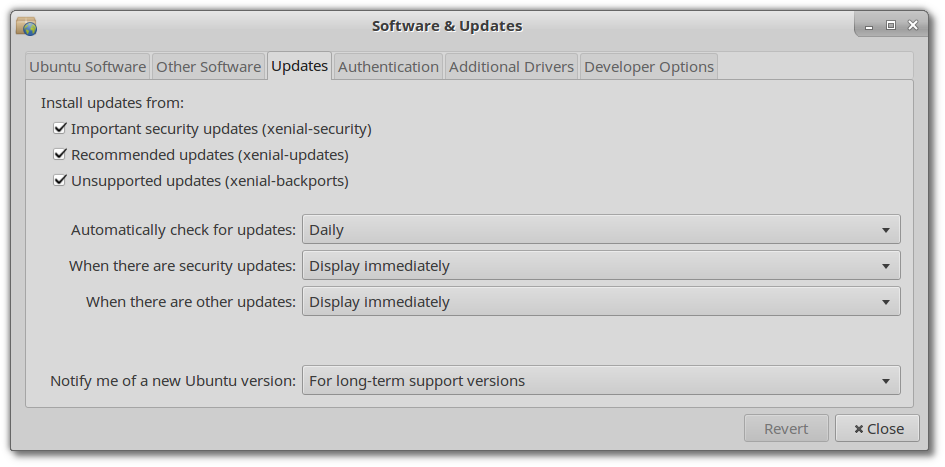
System Updates Settings
Select Settings → Software & Updates → tab Updates
The default setting is “Automatic Download and Install Updates”. Set package updates to “Notify”:
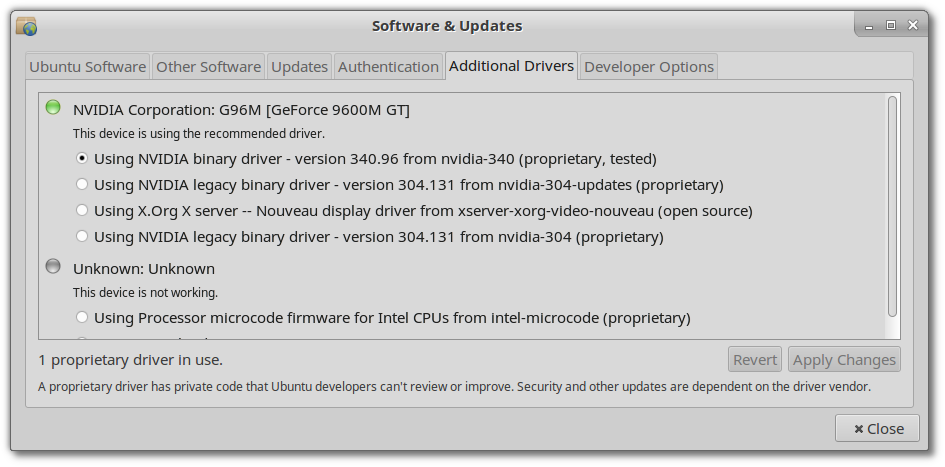
NVIDIA Drivers
Select Settings → Software & Updates → tab Additional Drivers
Change nouveau to NVIDIA:
Thunar (file manager)
View → view as Detailed list
View → Configure columns (add Owner Group Permissions)
Edit → Show hidden files
System font
Settings → Appearance → tab Font
Microsoft fonts
To install Microsoft fonts, use:
sudo apt-get install ttf-mscorefonts-installer
Window manager
Settings → Window manager
Set
- default theme
- Font Title
Xfce Panel
Right click to Xfce Panel and choose “Panel preferences”:
- Increase “Row size” to 32 pixels
Right click to Xfce Panel and choose “Add new items”:
- System Load Monitor
- Keyboard Layouts
- Show desktop
- Workspace Switcher
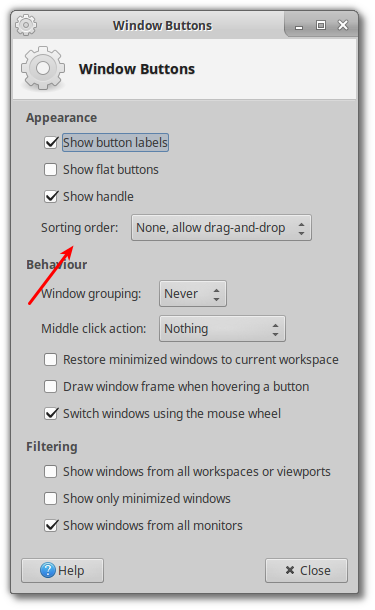
Set Xfce Panel Window Buttons Sorting order
To be able to sort Window Buttons (each running window handler in Xfce panel) using drag and drop, right click to panel (or Settings → Panel), go to tab “Items”, select “Window buttons” and press the properties button:
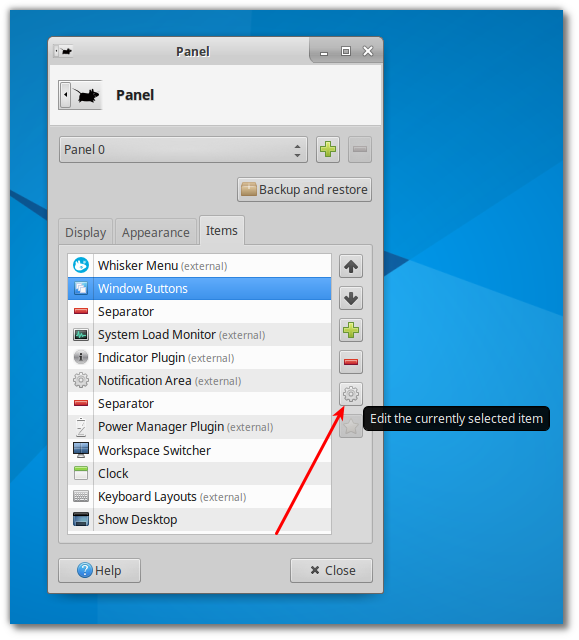
Change Sorting order to drag and drop:
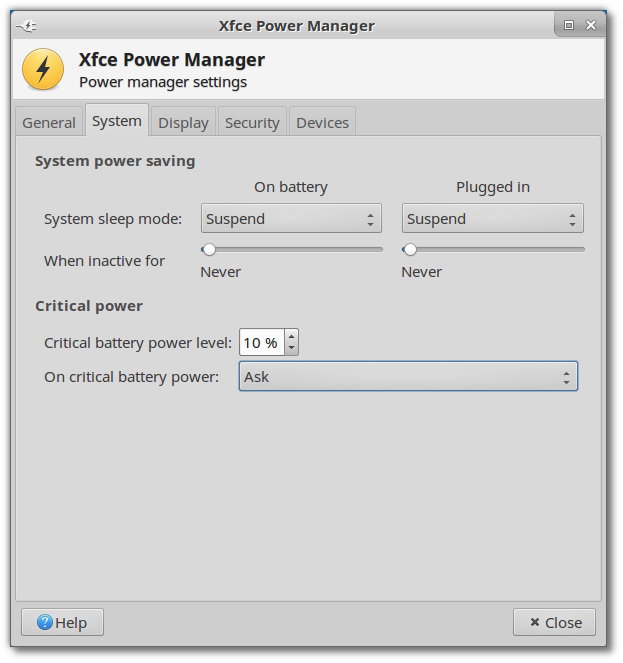
Power Manager
Settings → Window manager → tab System
Wallpaper
Right click on Desktop and choose “Desktop settings”. Then select a background.
NOTE: In Xfce you may have different wallpaper per workspace “out of the box” without plugins or extra settings! Just select a Workspace and then change desktop background.
Tweak Firefox
Firefox is preinstalled in Xubuntu. See this post for details: How To Setup And Configure Mozilla Firefox on Ubuntu 16.04.
Tweak Libreoffice
Adding Spell-check for your language is simple.
Select Settings → Language Support. Xubuntu will check automatically for your language dictionaries and will set them up.
Networking
After default setup you will find Gnome Network Manager on Xfce panel. Ethernet Network (wired connections) and Wireless Networks (Wi-Fi) are all available there.
Assign static IP address
After default setup your computer will obtain a “fake” IP address automatically, using DHCP. If you want to assign a static IP address:
Top bar → NetworkManager → Edit connections
Then
Ethernet → Wired connection 1 → Edit → IPv4 settings
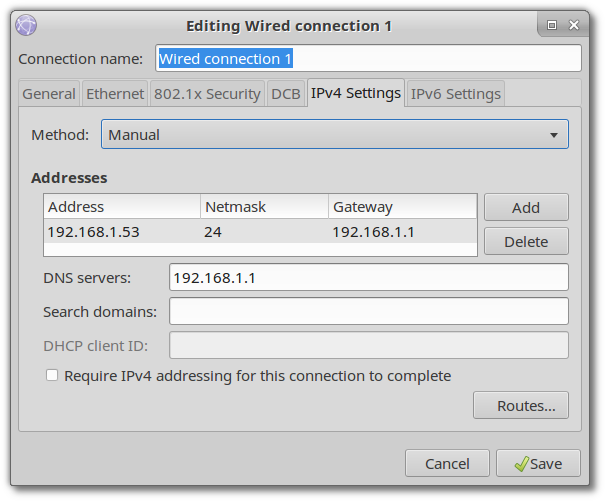
and press Save
Enable the changes you made
Top bar → NetworkManager → Ethernet Network → Disconnect
Then connect again
Top bar → NetworkManager → Ethernet Network → Wired connection 1
Check the changes you made
Top bar → NetworkManager → Connection Information
or using command line:
ifconfig
Desktop magnification
Desktop magnification is an accessibility feature. It is also very important, when you create screencast videos.
In Xfce <Alt+Scrollwheel> zooms the entire desktop (up to Zoom in, down to Zoom out).
NOTE: If you want to disable this feature
Settings → Settings editor → select xfwm4 → change property zoom_desktop
Install more Graphical applications
See relevant section in Ubuntu setup.
REMARK: some minor differences:
-
Dropbox
Install Dropbox the same way as in Ubuntu:
sudo apt-get install nautilus-dropbox
In Xfce there is a bug with Dropbox Panel Icon (it is not working). To fix it
nano /usr/local/sbin/fix-dropbox.sh
        #!/bin/bash

        dropbox stop && DBUS_SESSION_BUS_ADDRESS="" dropbox start
Call this script every time computer starts:
fix-dropbox.sh
-
Text editor
You will not find Gedit in Xubuntu. Install Geany instead:
sudo apt-get install geany
-
CD burning
Xfburn is preinstalled in Xubuntu (so, you do not have to install Brasero).
-
Gnome disks
You will not find Gnome disks in Xubuntu. Install Gnome disks using:
sudo apt-get install gnome-disk-utility
Install Web Development software
This section is optional.
See relevant section in Ubuntu setup.
REMARK: the only difference I have to mention is about Gvim. In Xubuntu vim-gtk is preferable than vim-gnome as you do not want to install Gnome libraries on which vim-gnome depends:
sudo apt-get install vim-gtk
Setup peripherals
Printer – scanner
Itâs quite easy to setup a printer (in my case HP OfficeJet 4500).
Menu → Settings → Printers → Add
Then use the wizard.
Web camera
It will be detected automatically during installation. You can try it using cheese:
sudo apt-get install cheese
Cloud integration
See relevant section in Ubuntu setup.
Recovery mode
Press and hold “SHIFT” key during boot. GRUB (boot loader) menu will display. Select “Advanced Ubuntu Options” to enter Recovery mode.
Backup your workstation
See relevant section in Ubuntu setup.
REMARK: Deja-dup is not preinstalled in Xubuntu, so you have to install it:
sudo apt-get install deja-dup
Synopsis
Operating system
| Base Linux System | default setup |
CLI software
| File manager | Midnight commander | |
| Process viewer | htop | |
| Bandwidth usage monitor | iftop | |
| Networking | OpenSSH | |
| Samba | ||
| File archivers | p7zip | |
| unrar | ||
| Secure delete | wipe |
Programming languages
| GNU bash | 4.3.43 | default setup |
| Perl | 5.22.1 | default setup |
| Python | 2.7.11+ | default setup |
| Java | Oracle JDK 8 |
Desktop environment
| Xfce | default setup |
Apps
| Terminal | Xfce Terminal | default setup |
| Byobu | ||
| Terminator | ||
| Settings manager | System Settings | default setup |
| NVIDIA X Server Settings | ||
| File manager | Thunar | default setup |
| Password manager | KeePaasX | |
| Cloud storage client | Dropbox | |
| Package manager | Synaptic | |
| Web browser | Firefox | default setup |
| Google Chrome | ||
| Mail client | Thunderbird | default setup |
| Download manager | uget | |
| BitTorrent client | uget with aria2 plugin | |
| BitTorrent client | Transmission | default setup |
| FTP client | Filezilla | |
| Text editor | Mousepad | default setup |
| Text editor | Geany | |
| Run as user | gksu | |
| Screen tool for eyes protection | Redshift | |
| Office suite | LibreOffice | default setup |
| PDF reader | Document Viewer | default setup |
| Image/photo editor | Gimp | |
| Image viewer | Ristretto Image viewer | default setup |
| Screenshot take | Screenshot | default setup |
| Shutter | ||
| Graph editor | yEd | |
| Extra media codecs | xubuntu-restricted-extras | |
| Video converter (FFmpeg GUI) | Winff | |
| Video editor | OpenShot | |
| Slideshow editor | Imagination | |
| Screen Recorder | Kazam | |
| Web cam | Cheese | |
| Audio editor | Audacity | |
| Media player | Parole | default setup |
| VLC | ||
| Scanning | Simple scan | default setup |
| gscan2pdf | ||
| CD burning | Xfburn | default setup |
| File archivers | Gnome Archive Manager | default setup |
| Peazip | ||
| Sync tool | FreeFileSync | |
| System profiler | hardinfo | |
| Disk partitioner, S.M.A.R.T. monitoring, benchmarking etc | Gnome disks | |
| Disk partitioner | gparted | |
| Disk health inspection tool | GSmartControl | |
| Hardware temperature monitoring tool | psensor | |
| Backup | Deja-dup | |
| Encryption | AEScrypt | |
| Virtualization | Virtualbox | |
| Remote access | Teamviewer | |
| Music Notation | MuseScore | |
| Games | Mines | default setup |
| Sudoku | default setup | |
| Quadrapassel |
Apps for Web Development
| Version control | Git | |
| PHP IDE | PhpStorm | |
| Code editor | Gvim | |
| Localization tool | Poedit | |
| Diff/merge tools | Diffuse | |
| Meld | ||
| Database Manager | PgAdmin3 | |
| Documentation generator | Doxygen | |
| Javascript Documentation generator | JsDoc Toolkit |
Screenshots Collection
View Screenshots Collection here.
Related Posts
You may also be interested in
- How To Setup a Workstation Computer With Ubuntu Desktop 16.04 LTS Step by Step
- Package Management and System Update in Ubuntu Desktop
- Debian 8 Jessie Dedicated Web Server Setup Step by Step
- Manage Your Passwords With KeePass in Linux And Android
- Tweak SSD Drive in Ubuntu 16.04 Workstation
- How To Setup Samba on Ubuntu Workstation
- How To Setup Java on Ubuntu 16.04
- How To Setup And Configure Google Chrome on Ubuntu 16.04
- How To Setup And Configure Mozilla Firefox on Ubuntu 16.04
- How to Use APC UPS with Two or More Computers – Master Slave Setup
- Setup APC UPS on Ubuntu Workstation using apcupsd
- Manage UPS Using Power Management on Ubuntu 16.04
- How To Setup Virtualbox on Ubuntu 16.04
- How to Create Partition Image Backup and Restore Using Clonezilla
- Easily Compress and/or Encrypt Files in Linux Using 7z (p7zip) Archiver
- Fix Mouse Sensitivity in Ubuntu 16.04
- How to Remove Old Kernels in Debian and Ubuntu
- How To Create Fast And Reliable Backup Using Rsnapshot
- How To Setup And Configure PhpStorm on Ubuntu
Entrepreneur | Full-stack developer | Founder of MediSign Ltd. I have over 15 years of professional experience designing and developing web applications. I am also very experienced in managing (web) projects.