
Infographic with Canva: one of the best ways to display statistics and data in formats that are readable and engaging for your audience to share your content on social media. The good thing is, you don’t need to be a great graphic designer or work with one to create a fantastic infographic. Not when you have Canva.
This article contains detailed information on how to create an infographic using Canva. You can be sure that you have the right guide in this article, and once you’re done, you will be sufficient to create your infographic with Canva.
How to go about it?
The first thing to do before you are able to use this tool is to open an account with Canva. It is straightforward, and you can also log in with Facebook, Gmail, and other email address. Once you’ve done this, you need to follow the instructions for setup before selecting ‘Infographic’ under ‘Create a Design.’
This will open up the Canva dashboard on which you can start to create your designs. For clarity’s sake, here are a few steps for creating an infographic with Canva.
1. Browse the layouts

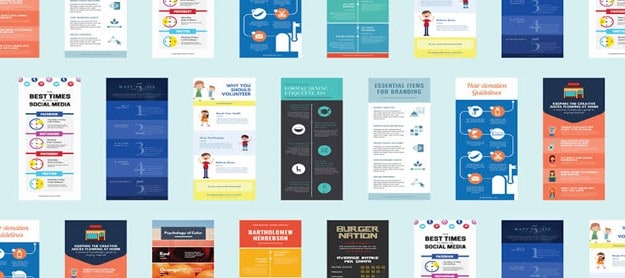
Canva has some free and premium templates that have been pre-designed for infographics. The difference in these templates is the layout, subject, and design. You are more likely to find at least one template that fits directly into your project than not.
If you are using one of these pre-built layouts, the first thing to do is select ‘Layout’ at the menu bar on the left side. Then choose one of the layouts that suit you the most by clicking on it, so it moves to the middle of the page.
If you want to customize one of the pre-built layouts, click each element individually. Then replace or alter the background, images, text, and other elements of how you see fit.
But if you are trying to develop your infographic from scratch, this first step isn’t for you.
2. Pick a background

Canva provides its users with both free background and premium ones to choose from for their infographics. If you want a pattern, color block, image, etc., you will find it there.
It is also effortless to change the infographic background in Canva. All you need to do is go to ‘Menu’ and click on ‘Background’ and then browse through the backgrounds. If you are undecided, click on one of the backgrounds to preview it on an infographic.
After choosing the background, you’re able to customize the appearance, add filters, change the color, alter the transparency, etc. all from the menu bar.
3. Add the text

After choosing a good background for your infographic, the next thing is to start to add your text to it. This is, again, relatively easy. Just click ‘Text,’ decide on the type of header you want to use, then drag and drop your preferred font type. There’s a text box for you to write indirectly, which you can also resize and adjust the text position of your infographic. The editor menu right at the page’s top gives you extra options for customization.
4. Choose the right graphic element
The elements are the section that is of utmost importance to you. This section contains graphics that can help you spice up your infographic’s visual aspect and make it very fun while supporting the major points in your text.

There are different categories in which the elements are broken into:
- Free photos
- Charts
- Illustrations and icons
- Shapes and lines
- Grid and frames
If you want to choose and use a graphic element on your infographic, go to the appropriate category and drag-and-drop or double-click the element that you want to the screen.
You can move the graphic elements around the infographic, and you can also resize them. The editor menu at the top page also contains different settings that you can apply, including the option to add a URL link to a particular element.
Extra graphic elements
There is a strong chance that you might want to use plenty of other features in your infographic, which might depend on the graphics you’re adding to the infographic and the image types you are using.

- Search – the search function is something that you can use to browse through the library of Canva for both free and premium illustrations and photos.
- Uploads – if there’s a specific graphic or image that you want to use but isn’t on Canva or you can’t find it on Canva, you can upload the graphic straight from your Facebook account or your desktop.
After adding this image or infographic, and you’ve arranged other necessary visual elements and text that you need, you should have been done creating your infographic and be ready to use and publish it.
5. Share the infographic
The final step in creating the infographic with Canva is sharing the infographic. There’s a ‘Share’ button at the page top in the menu that you can click on.

Then there are four different sharing options that you can choose from:
- Social – share the infographic on Twitter or Facebook.
- Link – send out a link to individuals to view and/or edit the design for you.
- People – invite other people to view the infographic.
- Embed – embed the infographic on the web with lime of code or a simple link.
Top tips for creating a successful infographic
Using canvas is not difficult at all. It is a straightforward tool. But the fact that you can throw an element on a page or dashboard doesn’t mean you’ll be able to create a successful infographic. There are other things that you can do. You can also check the ideas from the best dissertation writing service to aid your design process.
Create a flowing infographic
A flowing layout is a common feature of successful infographics. When your audience sees the infographic, they automatically know the first place to look and the next place.
To create flow in your infographic, use:
- Bold text and subheading to break stats.
- Dots and line so the audience can follow a particular path
- Numbers, so the data is orderly.
The flow won’t be apparent when the infographic isn’t well organized, and you lose your audience’s attention.
There’s the right infographic for every project
The presentation of your infographic is quite essential. There are different infographic styles, and you have to choose the one that represents your discussion best. The infographic types that are used the most are:
- Compare and contrast: this highlights the differences and similarities between two products or ideas.
- Timelines: it displays information within a timeline to aid the explanation process or show a subject’s evolution.
- Alphabetic order: the data is presented alphabetically to help structure the topic and provide a reading order.
Use eye-catching and relevant visual elements

Using eye-catching and fun visuals is essential to design a successful infographic. Images have to back up your main stats while you also give the text an interesting dynamic. Your visual elements should aid the infographic flow and not hinder it.
Conclusion
Canva allows you to create beautiful, professional, and stylish infographics. After making the infographic, don’t hesitate to share it everywhere on social media. This will allow you to increase your brand awareness and engagement with your followers. You will also be able to increase your followers and improve the traffic on your website.
Featured Videos
Emma Coffinet is a content creator for websites, blogs, articles, white papers, and social media platforms, assignment help, such as at EduGeeksClub. She is keen on capturing the attention of a target audience. She keeps herself well-read with the changing trends of the web world. Emma loves to pen down her knowledge in an engaging and simplified way. She also enjoys leading, motivating, and being part of a productive team; equally comfortable working on her own initiative. Feel free to connect with her on Twitter.