
PhpStorm is my favorite PHP IDE. It is a commercial Java application from Jetbrains. It combines performance with a great interface and an excellent Git integration. Very good documentation and support.
I have tried many other great IDE (Integrated Development Environment) for web development from time to time. HTML, CSS and JavaScript as front-end and mainly PHP for back-end (secondarily Perl, Python). I also want to write Bash scripts with the same tool.
Some of them are:
- Eclipse PDT
- Netbeans
- Komodo IDE
- and recently Sublime Text
I don’t use IDEs which provides “visual” tools. I prefer to write code.
I use Git as VCS (version control system). My code is hosted on Github (and Bitbucket).
I use Github Issues to track tasks and bugs.
What do you need from an IDE?
First things first: the perfect IDE, simply, does NOT exist.
These are some important features (imho) for a good IDE for web development:
-
Code assistance
What I mean with this is:
- Syntax highlight
- Code completion
- Error checking
- Code formatting (beautifier)
It is very important the above tools to be functional in code with more than one “languages” (eg php, html, css, javascript). The more qualitative is the code you write, the more separated will be the backend from the frontend. Here they come to help the various frameworks. However, it is not always easy to avoid the coexistence of more than one programming “language”. This is the rule in web development.
-
VCS integration (Git in my case)
-
Integration with Issue Trackers (Github Issues in my case)
-
Performance
Performance is critical for everyday work. However, the more features an IDE offers, the more reduced performance will appear. It is logical and expected.
-
Easy code navigation
-
Advance Search and Replace in file(s)
-
Tab support
-
Easily manage source files (encoding, line separators, tab size, handle large files etc)
-
Project manager
Useful but not critical features:
-
Integration with databases
For me, Adminer for MySQL and PgAdmin for Postgresql are enough.
-
Debugging
The use of a debugger is more crucial for classic software development (C++, Java etc) than for web development.
For frontend debugging Chrome DevTools is enough for me. For other browsers I use Browserstack.
For backend (PHP) debugging I use these settings in development server:
        ini_set('display_errors', 'On');
        error_reporting(E_ALL);
In most cases simple echo or var_dump statements are enough.
Only in complex situations I use Xdebug.
- Testing
- Support code documentation tools
- Support various frameworks
Installation
Current version (at the time of writing this article) is PhpStorm 2016.3
The installation took place on Ubuntu 16.04 LTS. However, as PhpStorm is a Java application, the whole process is similar for every Linux distribution.
Download PhpStorm
Download Linux version here.
Then unpack the .tar.gz file in any folder. I use ~/Apps folder. So, the command:
tar xvzf PhpStorm-2016.3.2.tar.gz
will create the folder:
~/Apps/PhpStorm-163.10504.2
Only the first time, open a Terminal, go to bin directory in the installation folder:
cd ~/Apps/PhpStorm-163.10504.2/bin
and run the launch script:
./phpstorm.sh
Import settings
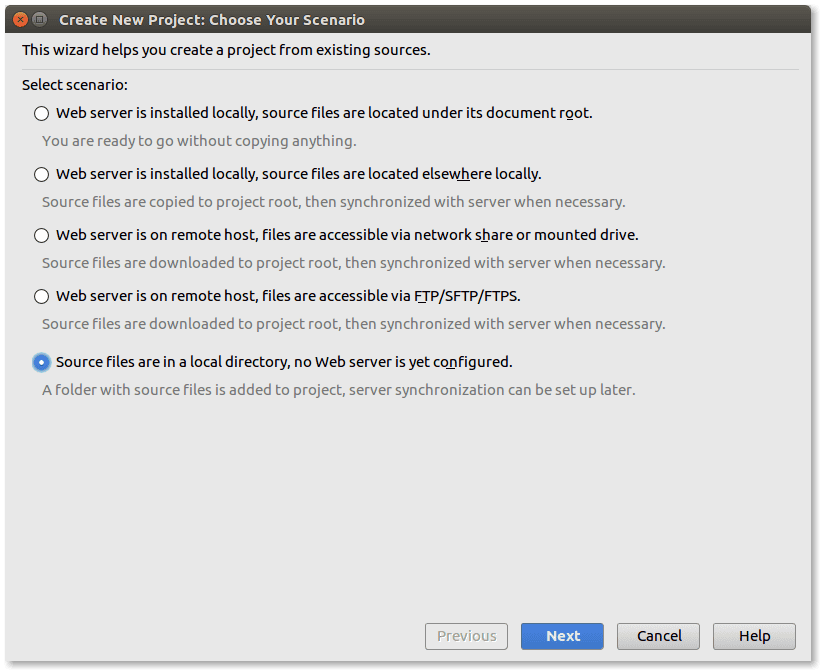
Starting a version of PhpStorm for the first time you will see this dialog:
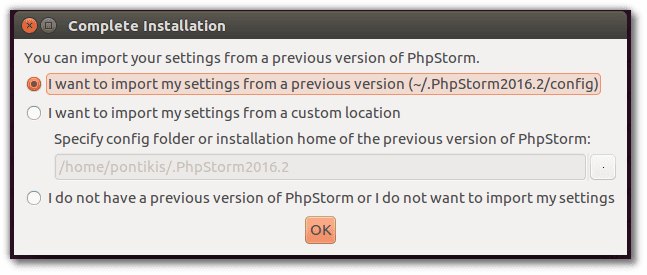
In my case I selected the first option, as I upgraded from 2016.2 to 2016.3 version.
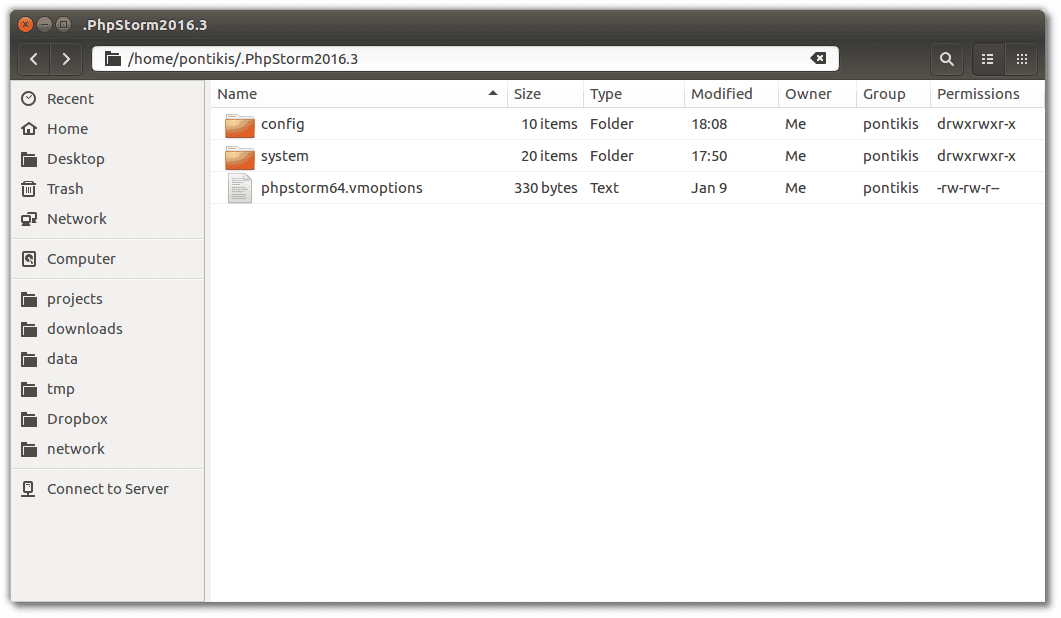
This will create the settings folder in your home directory ~/.PhpStorm2016.3.
Create a Desktop entry and add it to Ubuntu Unity Launcher
Use the PhpStorm tool:
Menu → Tools → Create a Desktop entry

Now you can launch PhpStorm using Ubuntu Unity Dash (see image). Open Dash (click the top button of the Launcher or press SUPER key) and type some letters (eg “phpstorm”):

Drag the icon to Ubuntu Unity Launcher to add it here.
Actually, this action creates the file /usr/share/applications/jetbrains-phpstorm.desktop. You can create it by yourself, if you prefer:
sudo nano /usr/share/applications/jetbrains-phpstorm.desktop
In my case:
[Desktop Entry]
Version=1.0
Type=Application
Name=PhpStorm
Icon=/home/pontikis/Apps/PhpStorm-163.10504.2/bin/phpstorm.png
Exec="/home/pontikis/Apps/PhpStorm-163.10504.2/bin/phpstorm.sh" %f
Comment=The Drive to Develop
Categories=Development;IDE;
Terminal=false
StartupWMClass=jetbrains-phpstorm
REMARK: Replace /home/pontikis/Apps/PhpStorm-163.10504.2/ with your path (where you unpacked PhpStorm).
Manage License
You may use the trial version or register the program using:
Menu → Help → Register

The first option (using your Jetbrains account) is the most convenient.
Configuration – Java settings
Which JDK to use?
By default the bundled JRE (based on OpenJDK 8) is used. This is the recommended JDK. To view the actual JDK version, use:
Menu → Help → About

Read the PhpStorm launch shell script (/installation_path/bin/phpstorm.sh ) to understand the order with which PhpStorm will search for Java in your system:
...
# ---------------------------------------------------------------------
# Locate a JDK installation directory which will be used to run the IDE.
# Try (in order): PHPSTORM_JDK, phpstorm.jdk, ../jre, JDK_HOME, JAVA_HOME, "java" in PATH.
# ---------------------------------------------------------------------
...
So, if you want to use another JDK, an easy way is to create the file phpstorm.jdk inside config folder:
nano ~/.PhpStorm2016.3/config/phpstorm.jdk
and add the relevant path, for example
/opt/jdk1.8.0_102
Then, restart PhpStorm.
REMARK: I use Ubuntu Mono font, which does not appear normally with Oracle JDK. It works fine with default (bundled) JRE.
Memory settings
These settings included in file ~/.PhpStorm2016.3/phpstorm64.vmoptions in your home folder (concerning 64bit version).
This is the default file:
-Xms128m
-Xmx750m
-XX:ReservedCodeCacheSize=240m
-XX:+UseConcMarkSweepGC
-XX:SoftRefLRUPolicyMSPerMB=50
-ea
-Dsun.io.useCanonCaches=false
-Djava.net.preferIPv4Stack=true
-XX:+HeapDumpOnOutOfMemoryError
-XX:-OmitStackTraceInFastThrow
-Dawt.useSystemAAFontSettings=lcd
-Dsun.java2d.renderer=sun.java2d.marlin.MarlinRenderingEngine
You may use the PhpStorm Diagnostic tool:
Menu → Help → Diagnostic → Change memory settings
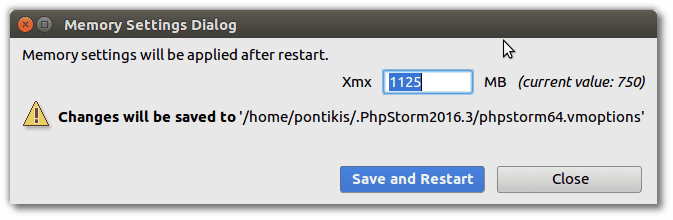
or you may edit this file manually:
nano ~/.PhpStorm2016.3/phpstorm64.vmoptions
I made the following changes in my workstation (16 GB RAM)
-Xms512m
-Xmx2048m
-XX:ReservedCodeCacheSize=240m
-XX:+UseConcMarkSweepGC
-XX:SoftRefLRUPolicyMSPerMB=50
-ea
-Dsun.io.useCanonCaches=false
-Djava.net.preferIPv4Stack=true
-XX:+HeapDumpOnOutOfMemoryError
-XX:-OmitStackTraceInFastThrow
-Dawt.useSystemAAFontSettings=lcd
-Dsun.java2d.renderer=sun.java2d.marlin.MarlinRenderingEngine
REMARK from Java documentation:
-Xms<size>        set initial Java heap size
-Xmx<size>        set maximum Java heap size
Configuration – PhpStorm settings
You can access PhpStorm Settings from:
Menu → File → Settings
After finishing your changes, do not forget to export them to Settings Repository or to a file (see below “Import – Export PhpStorm settings”).
Layout
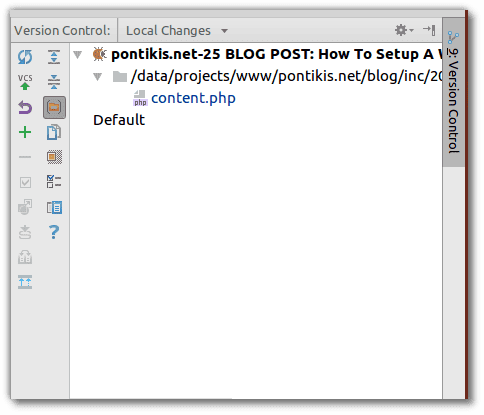
First, create your Layout, using the available windows. I prefer to view “Project” and “Remote Server” on the left side of main “Editor” window and “VCS/Local changes” and “Favorites” on the right side. Something like this:
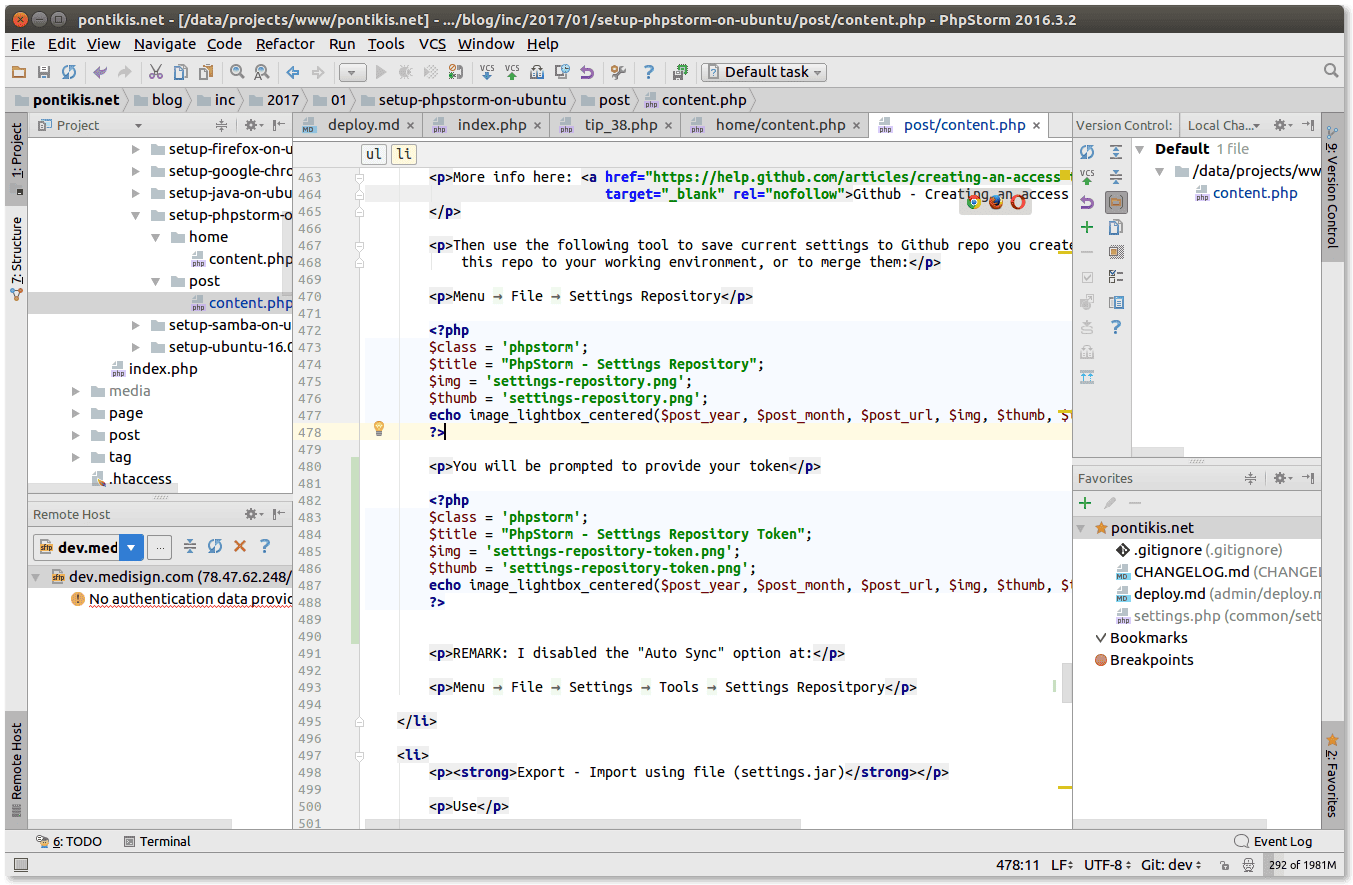
Store the layout you like as default:
Menu → Window → Store Current Layout as Default
Appearance
PhpStorm is fully customizable (theme, fonts, code style per language etc). Manage the most important settings here:
Menu → File → Settings → Appearance & Behavior → Appearance
Menu → File → Settings → Editor
Quick Switch Scheme
You can quickly change Appearance (without go to “Settings”) using:
Menu → View → Quick Switch Scheme

Remote Servers
If you need to work with Remote Servers, define them at:
Menu → Tools → Deployment → Configuration
Plugins
Browse the installed plugins or install new using:
Menu → File → Settings → Plugins
Manage passwords
Open “Settings” and go to:
Menu → File → Settings → Appearance & Behavior → System Settings → Passwords
Here you can define your password storage policy.
I use KeePassX to manage passwords in my system, so I avoid to permit other applications (web browser, PhpStorm or whatever) to store passwords. So, I chose the third option.

However, if you use a lot of Remote Git Repositories, Remote Servers etc it is a good idea to use the first of second option.
Import – Export PhpStorm settings
There are a lot of settings you change in order to customize the IDE you are using. So, it’s very important to have a tool to export these settings and apply them again when you reinstall the IDE in another computer.
You have two options:
Settings repository (recommended)
Create a (private) Github repository (eg “phpstorm”). You may use Bitbucket if you prefer.
Get a Github Access Token, which is a secure way to access the GitHub API, without provide your password over the network. For example:
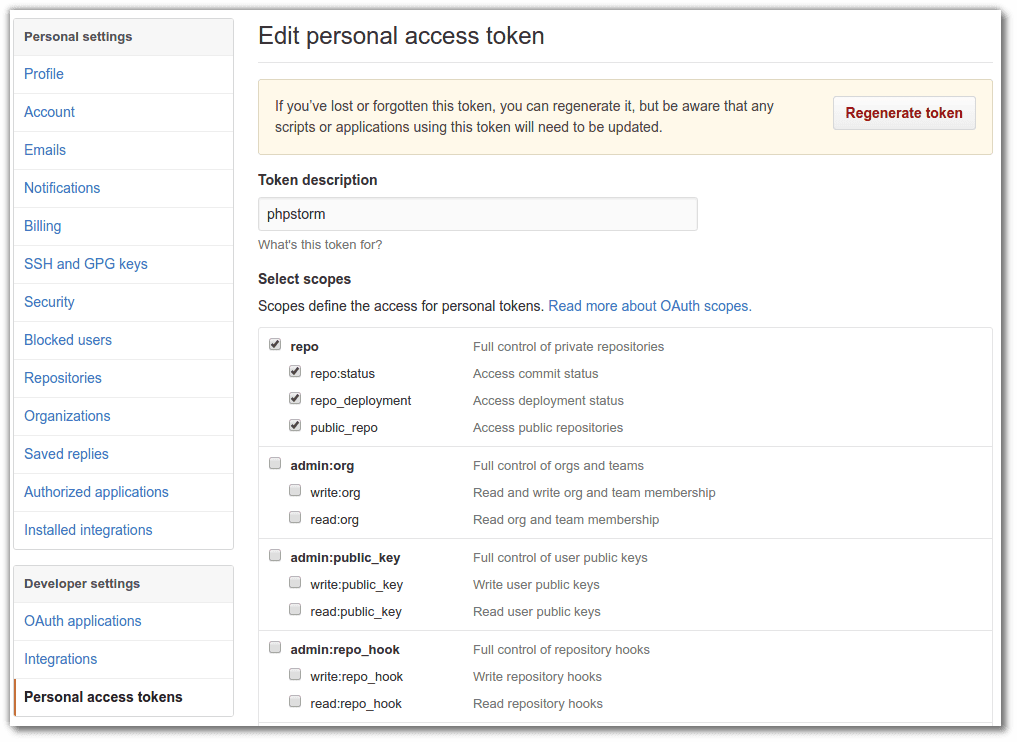
More info here: Github – Creating an access token for command-line use.
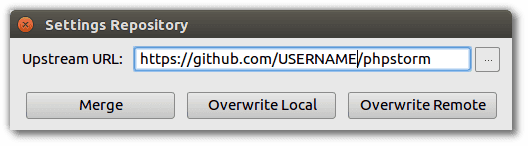
Then use the following tool to save current settings to Github repo you created or to apply settings from this repo to your working environment, or to merge them:
Menu → File → Settings Repository
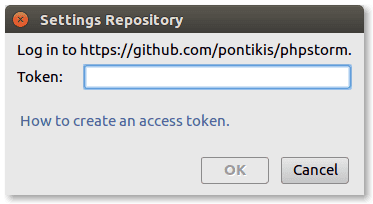
You will be prompted to provide your token
REMARK: I disabled the “Auto Sync” option at:
Menu → File → Settings → Tools → Settings Repositpory
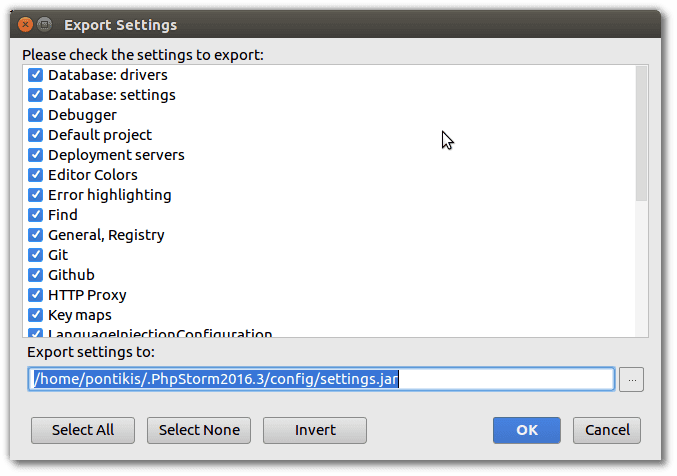
Export – Import using file (settings.jar)
Use
Menu → File → Export settings
and then
Menu → File → Import settings
to import them.
Basic workflow
Projects
Create New Project
From the Menu, select
Menu → File → New Project
Then follow the wizard.
I prefer the option
Menu → File → New Project from Existing files
because first I clone a project from Github using command line.
Manage Projects
Recently PhpStorm provides a basic Project manager (list, group projects etc):
Menu → File → Open Recent → Manage Projects
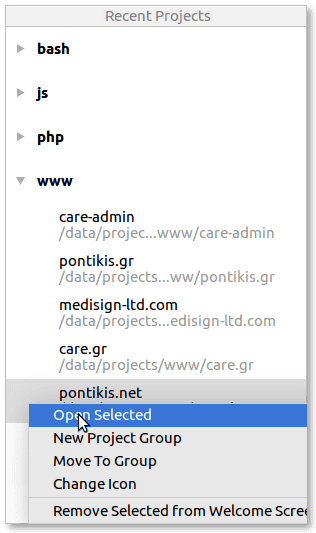
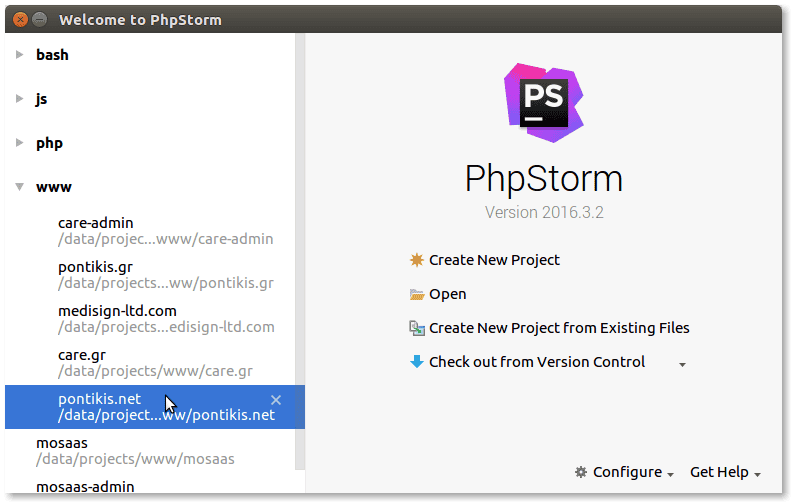
The same functionality (“Create New Project” and “Manage Projects”) is available from “Welcome screen”:
Using Git with PhpStorm
PhpStorm has an excellent Git integration. Actually, every Git functionality you may need is available through graphical tools.
Menu → VCS → Git
However, I use PhpStorm Git tools only for
commit
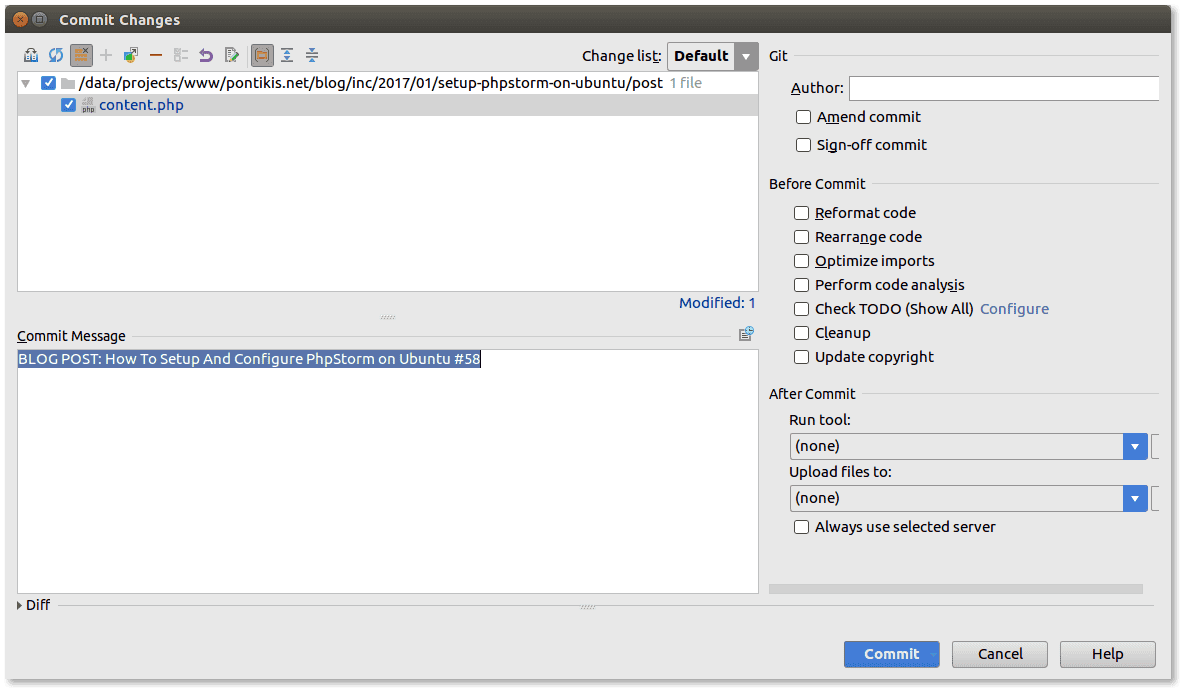
show diff
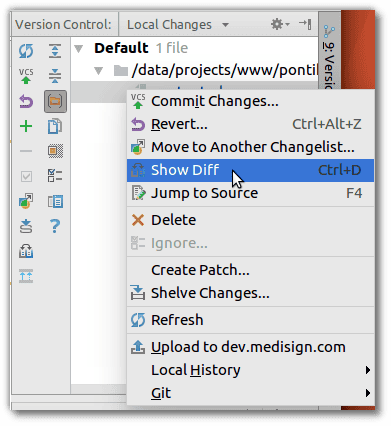
revert
view log
For everything else (clone, checkout, branch, push, tag, fetch, merge etc I use command line (I have created simple custom shell scripts for this purpose).
Remote servers
Although PhpStorm is an excellent environment to work with Remote Servers, I follow my own custom model.
Development server
I don’t have web server or database servers installed in my workstation. This software is installed in my development server, which is hosted in Hetzner.
My workflow in brief
- The code of all my projects is hosted in Github (and Bitbucket)
- Starting a project, I
cloneit from Github locally in my workstation. Then I create a PhpStorm project (“New Project from Existing files”) - In every project I create one or more dev branches. It depends on how complicated the project is and how many people are working together. In simple projects one dev branch is enough.
- When I make a change in the code, I commit it in a dev branch
using PhpStorm. Then I use a small custom shell script to
pushto dev branch on Github andpullto the same dev branch on Development machine. In this way I am able to view/test the results in the browser. - When I have completed a task I use a small custom shell script
which performs a
mergeto master branch and thenpush. The same script updates also Bitbucket repos (a kind of backup for me).
Using Remote Servers in the “classical way” PhpStorm downloads the remote project locally. When you save a local file it is uploaded (automatically by default) in the Remote machine. This can be a little faster comparing with what I do in step 4 (see above), but there is no Git repo locally. Additionally, project downloading for big projects is much slower than cloning it.
Anyway, it is a matter of preference for each developer.
Production servers
I do not use PhpStorm (or any other IDE I used in the past) for deployment on production servers. Most of them use Debian. I use Git from command line or custom shell scripts. Actually, after testing, I pull the master branch to Production machine.
Using Github Issues with PhpStorm
PhpStorm offers a great integration with the most popular Issue Trackers.
You can manage Github Issues directly from PhpStorm.
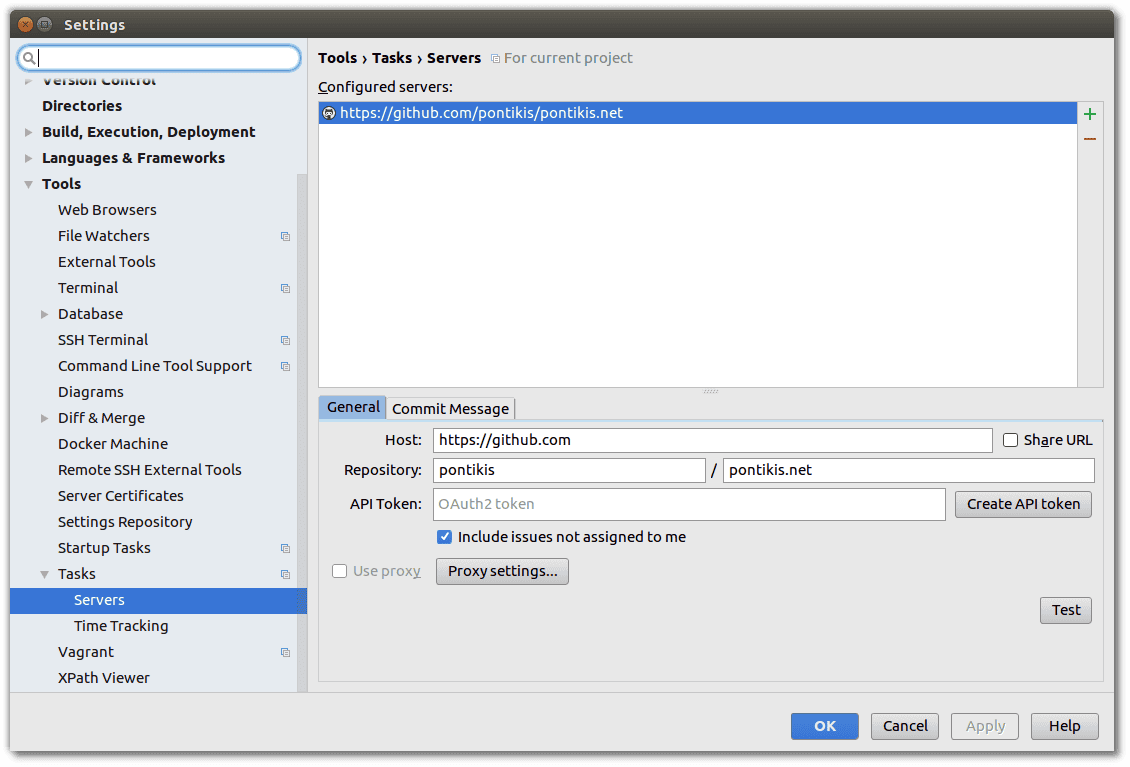
First, register Github Issues using your Github Token
Menu → File → Settings → Tools → Tasks → Servers
Open a task from Github Issues
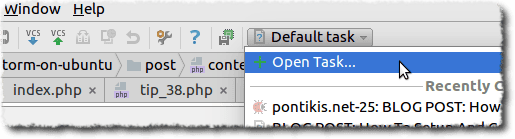
Open the task in PhpStorm
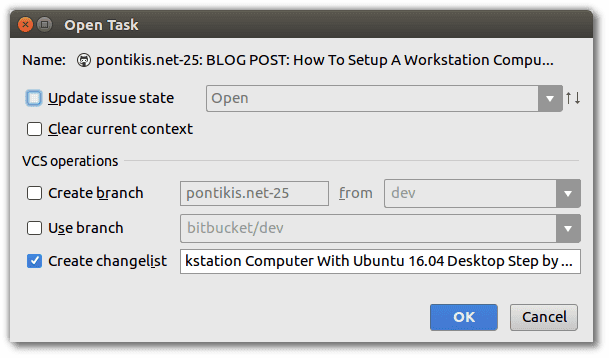
This will create a new Changelist
You can close an issue, either from commit message (recommended) or from PhpStorm.
Useful to remember
These are some useful tips for everyday use:
CTRL+ALT+L
CTRL+ALT+L is a shortcut to “Menu → Code → Reformat Code”
As CTRL+ALT+L is reserved in Ubuntu (“Lock Screen”), I change this shortcut to CTRL+ALT+K
To customize Keymap. use “Menu → File → Settings → Keymap”

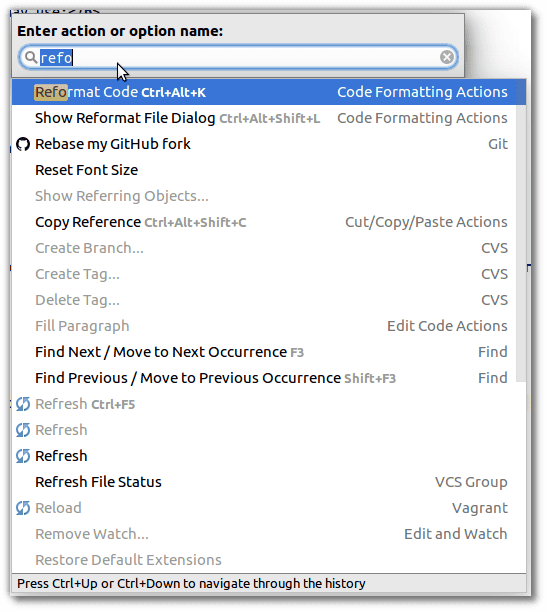
CTRL+SHIFT+A
CTRL+SHIFT+A is a shortcut to “Menu → Help → Find action” (it reminds the very popular feature Command Palette of Sublime Text).
For example, if you don’t remember how to reformat code, press CTRL+SHIFT+A and type something relevant:
CTRL+SPACE
Use CTRL+SPACE to force code completion (from the available options)
Hold down CTRL
Hold down CTRL over a variable (or function) to get valuable info about it
CTRL+CLICK
CTRL+CLICK over a variable (or function) will move you where itâs defined
Get Support
To get Official Support, use:
Menu → Code → Submit Feedback
You will be moved to https://intellij-support.jetbrains.com.
Log in using your Jetbrains account and post your feedback.
Entrepreneur | Full-stack developer | Founder of MediSign Ltd. I have over 15 years of professional experience designing and developing web applications. I am also very experienced in managing (web) projects.